
Vesta Music Express Tutorials / Platform guide
Vesta Music Release Creation Tutorial
This is an in-depth tutorial for the release creation flow of vesta music

By Vesta Music Corporation
· 31 steps · 15 min
Prepare your materials and open a new release
Keep the final audio, square artwork, artist information, contributor names, rights information and planned release date together before starting. Have any existing UPC or ISRC and supporting permissions available if they apply. Check Content guidelines for the current requirements.
After signing in, select Artist in the workspace switcher if your account offers both Artist and Admin.
Open Releases in the sidebar, then click New release at the top right.
The editor opens with four stages: Details, Cover art, Tracks and Distribution. Follow them in order for a new release. Use the stage navigation to return to a field you need to correct.
Screenshots show Vesta Music Demo version 3.2.4 on 13 November 2026. The populated single is the existing Vesta Music Track by vesta. New draft controls and the optional multi-track route are illustrated in a separate Tutorial Single draft. Sample names and settings should be replaced with your actual release information. No release was submitted or resubmitted while preparing this guide.
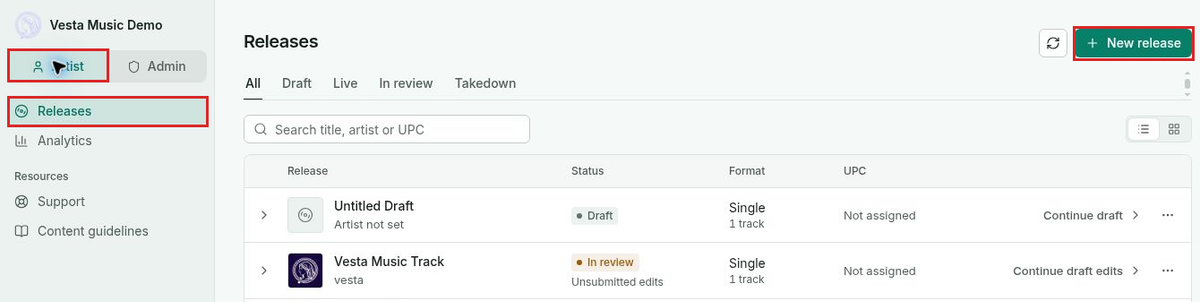
Start in Releases. Artist mode, Releases and New release are outlined in red. Start the release details
The first stage describes the release as a whole. Enter the title first, then work down the form. Leave Version blank when no version description applies; the interface gives Live or Remix as examples of version text.

A new draft starts as Not saved yet. Save draft is available at the top. Set genre, languages, advisory and release identifiers
Choose the primary Genre and, if useful, a Secondary genre. Set Audio language to the language of the recording, or mark Instrumental when appropriate. Metadata language describes the language used for the release metadata; check it separately from the audio selection.
Set Parental advisory deliberately. The form offers Not explicit, Explicit and Cleaned. Do not leave a default choice without checking that it describes the audio. Enter the correct Label, then review the remaining identifier and compilation options.
UPC is the release identifier. Assigned on release is the default shown here. If this release already has an appropriate UPC, use Enter manually and enter that identifier accurately. The Compilation option is labelled Tracks by various artists; select it only when that describes your release.
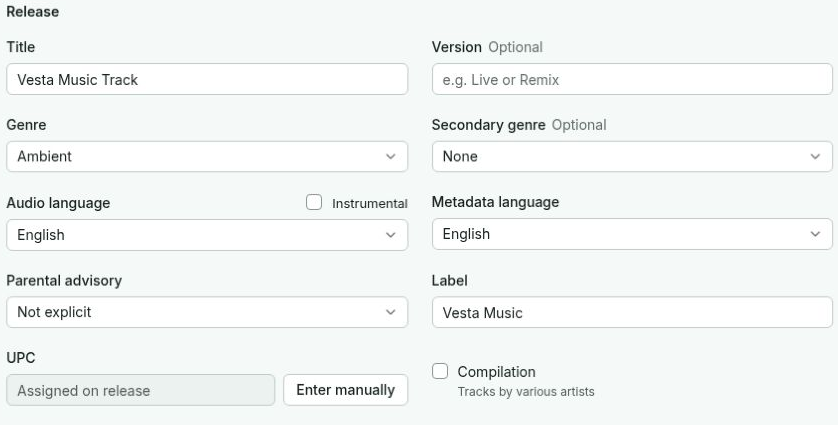
The populated example shows title, genre, languages, advisory, label and identifier settings. Select the main artist
In Credits, open Artists and search for the main artist by name. Wait for the results to load, then choose the correct existing artist. Typing a name alone is different from selecting its record.
If the artist is not listed, use Create artist and enter the artist’s information. Use Add artist for another artist credit and choose the appropriate role. The artist role choices include Main Artist, Featured Artist, Remixer and With.
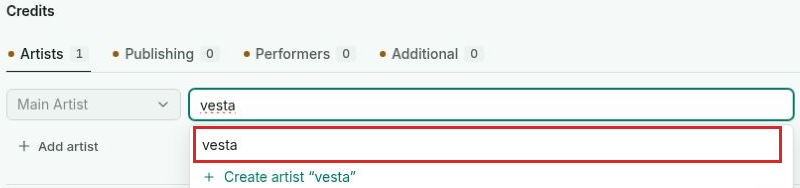
Select the existing vesta result. Create artist is a separate option for a new artist. Check Spotify and Apple Music profile routing
Use the edit pencil beside a selected artist to inspect its profile settings. For an established artist, verify the correct Spotify and Apple Music artist IDs, using the search controls where needed. Keep Create a new profile selected only when a new profile is intended. A matching display name alone may not identify the right artist.
Review the dialog before continuing. Its Continue button belongs to the artist dialog; after closing it, you are still in the release Details stage. The illustration shows the existing demo artist’s settings, without changing them.
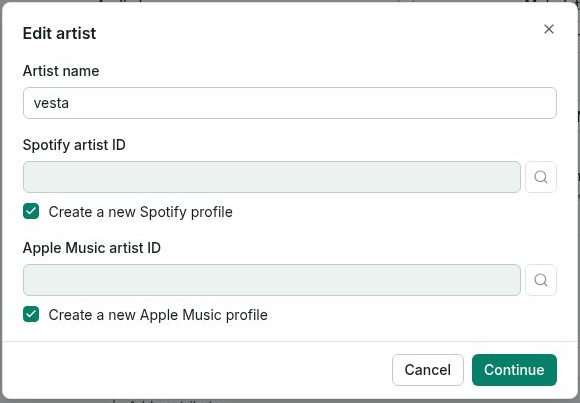
The artist dialog contains Spotify and Apple Music artist ID fields and new-profile options. Enter publishing credits
After the artist credits, work through Publishing, Performers and Additional. Record each person or artist under the role they actually performed. The tab counts help you see which groups contain entries.
Enter the writers’ legal names in the relevant fields. The demo uses First Last as placeholder text; replace it with the actual contributor information. Use Add writer for further applicable credits and make sure the names are complete and correctly spelled.
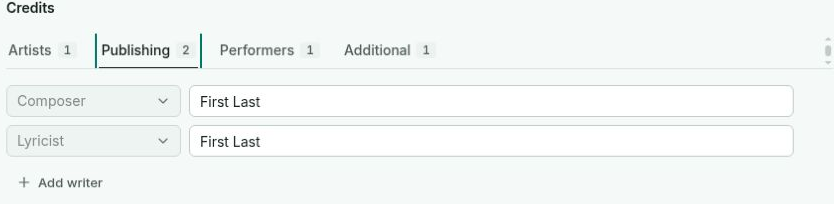
Publishing contains Composer and Lyricist fields and an Add writer control. Add performer credits
Choose the instrument or performance role, then select the contributor. All Instruments is the role used in this example. Use a more specific role when appropriate, and add separate entries for other performers.

Performers pairs a role with a selected artist and provides Add performer. Add production and other contributor credits
The example identifies vesta as Producer. Use Add contributor for further applicable roles. Review the role and the selected contributor together; an artist appearing elsewhere in the release does not automatically establish every credit.

Additional includes production and other contributor roles. Enter ownership and rights information
Continue below Credits to Copyright. Enter the owner names and years in the fields provided, then check Rights holder. The interface labels the two lines Copyright owner and Publishing owner; use the correct information for the release rather than copying the example.
The owner names do not have to be identical simply because they appear in the same section. Confirm the names and years with the release’s rights information. Leave Provider line blank when no provider text is required for your release.
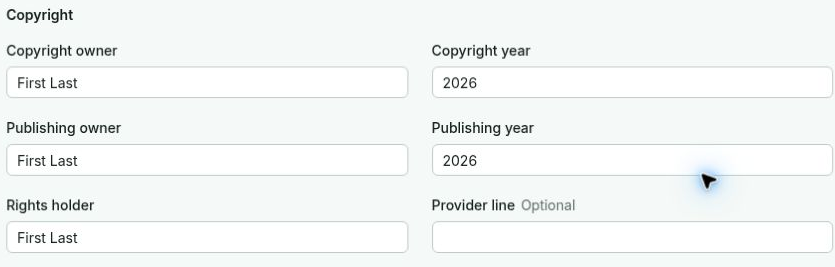
The ownership fields and optional Provider line beneath the credits. Save the release draft
Use Save draft at the top of the editor when you want to preserve your work. The header displays saving status. Wait for All changes saved before leaving the page or treating a change as recorded.
Continue also saved the example while moving to the next stage. Allow the save to finish when navigation controls are briefly disabled. A saved draft can still be incomplete; saving does not submit the release for review.

A saved example draft shows its Draft badge and All changes saved. Continue to Cover art
Click Continue to reach Cover art. If you need to stop here, return to Releases after checking the save status. The final page explains how to find the draft again without starting a duplicate release.

Continue advances from the current stage. Back returns to the previous stage. Choose and upload your artwork
In Cover art, click Drop artwork or browse and choose your image, or drag it into the upload area. The form accepts square JPG or PNG artwork, recommends 3000 × 3000 pixels, and states a minimum of 1400 × 1400 pixels.
Open Artwork rules before choosing the file. Use a clear original image with matching artist and title text, where those appear. The displayed rules prohibit misleading names, web or contact details, explicit sexual imagery and use of material without the necessary permission. Do not stretch a low-resolution cover to meet the dimensions.
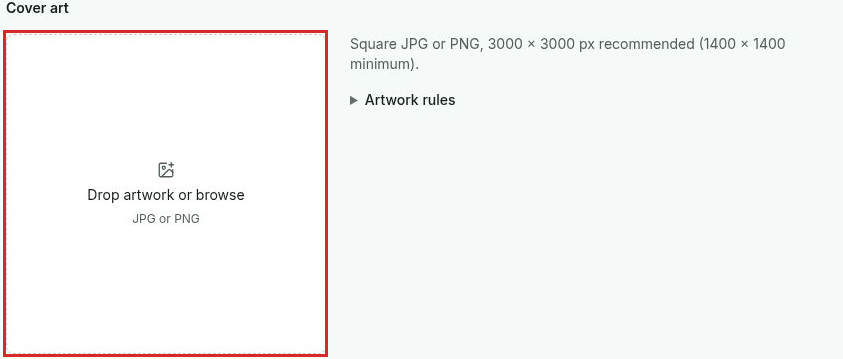
The artwork upload area and the size guidance shown for a new draft. Check the cover preview
Wait for the upload to finish, then check that the preview is the intended cover and displays correctly. Use Replace cover if the wrong file was chosen. Confirm the save status, then click Continue to move to Tracks.
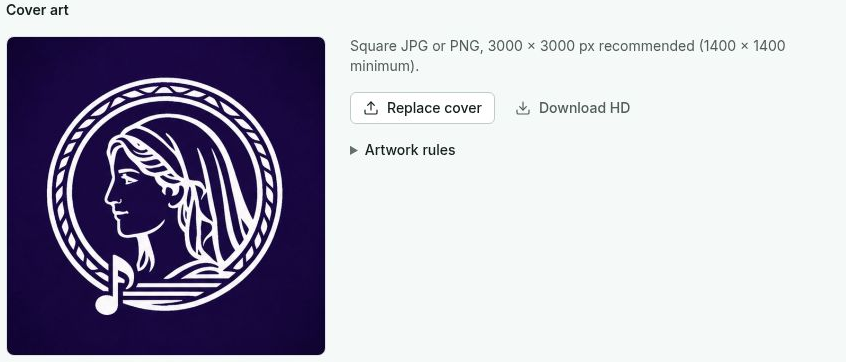
A populated example shows the preview, Replace cover and Download HD controls. Choose single-track mode
For one recording, leave Single (one track) selected. The single uses the release details and credits, so check those before uploading the audio. The expanded track row contains its upload or preview controls and its rights fields.

Single mode shows one track. Click the row chevron to collapse or expand it. Upload the final audio master
Click Drop an audio file or browse in the expanded track row and choose the intended final audio file. Wait for the upload to finish before leaving or replacing it. Check that you are uploading the correct master for this recording.

Use Drop an audio file or browse to choose the master for that track. Listen to the uploaded audio
After upload, check the recording title and duration. Play the preview, listen to the beginning and ending, and use the progress slider to inspect another section. Use Replace audio if the wrong recording was uploaded. The populated example also shows audio download controls.

The populated example has a player, replacement control and download controls. Check duration and audio requirements
The upload area says at least 30 seconds, while the current Content guidelines page requires at least 60 seconds for distribution. Follow the stricter published requirement and seek clarification if your release falls between them. The example recording is 3:26. Check the remaining current audio requirements as well; duration alone does not establish readiness.

The current policy states a minimum track duration of 60 seconds. Confirm the single uses the correct release information
Below the player, confirm that a single’s details and credits match the release. Edit release details returns you to the shared information if a name, advisory choice or other field needs correction.

Single mode points back to the release details and credits. Set the ISRC and attach supporting permissions
Leave ISRC on Assigned on release when an identifier should be assigned. Use Enter manually when the recording already has the appropriate ISRC, and check the full value carefully. Keep the release UPC and the track ISRC in their respective fields.
Mark Cover or Remix when applicable to the recording. These selections describe the material; they do not replace the permissions needed to distribute it. Use Attach files for supporting licenses or permissions when relevant. The form lists PDF, PNG or JPEG, up to five files of 10 MB.
Check that each document applies to the correct recording and intended distribution. Resolve missing or unclear rights information before submission. For an original single with no applicable third-party material, verify the choices and proceed to Distribution after checking the rest of the track.
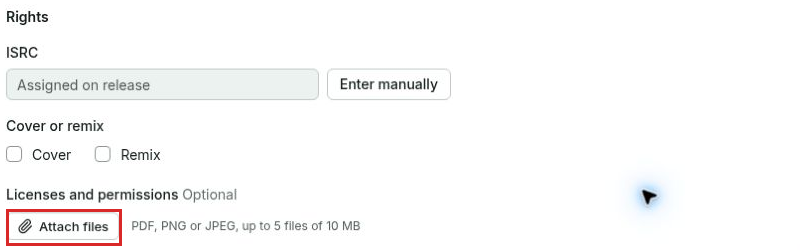
Track rights includes ISRC, Cover and Remix choices, and supporting file attachments. Add tracks for a multi-track release
For a release containing several recordings, clear Single (one track) before using Add track. The form exposes separate track details and credits. This page uses the separate Tutorial Single draft to illustrate those controls; its title is sample text, not a format instruction.
Expand each track and upload its own audio. Give each recording its correct title, version if applicable, genre, language and advisory setting. Check the rights fields and credits within that track rather than assuming every recording is identical to the release.
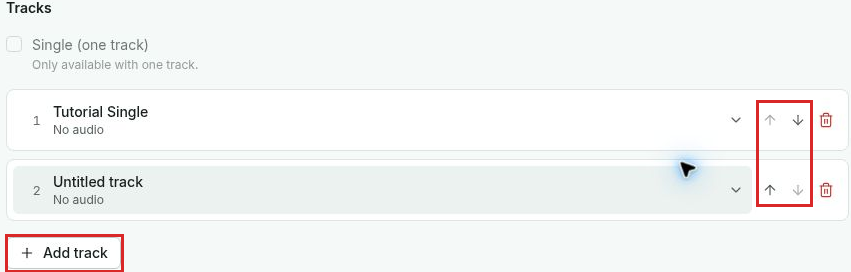
Add track creates another track row. Single mode is unavailable while more than one track is present. Complete each track and arrange the listening order
The multi-track form also provides owner and year fields, contributor groups, and Copy release artists. Use the release artists as a starting point only when they apply, then verify the artists and roles for each recording. New tracks can have empty fields that still need to be completed.
Use the up and down arrows to arrange the tracks in the intended listening order and check the row numbers again. Confirm that every row has the right title and audio duration and that no empty extra track remains in your real release. Once the full track list is ready, continue to Distribution.
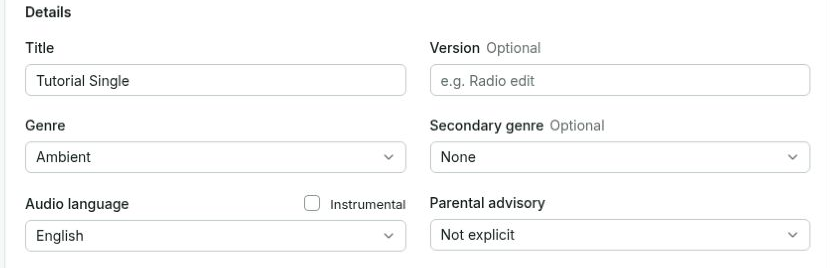
The separate track form includes genre, language and parental advisory fields. Select destination stores
In Distribution, review the store list and select the destinations intended for this release. The example has 35 of 43 selected. That is the demo configuration, not a required selection for every release.
Use the individual checkboxes to make deliberate choices. Select all and Clear are shortcuts, so check the resulting selection rather than assuming every service has the same requirements. Scroll down to review More stores before moving on.
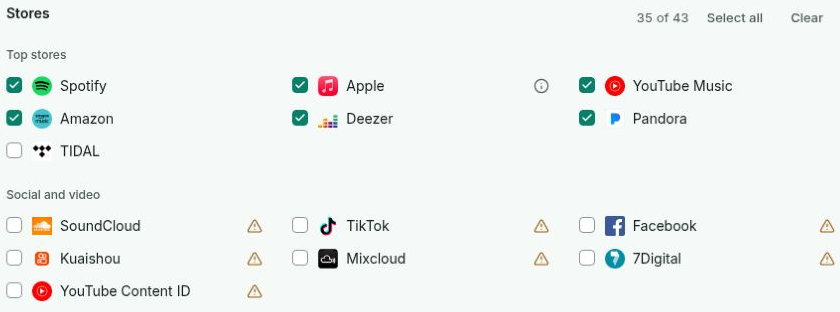
Store choices are grouped into Top stores, Social and video, and More stores. Review the remaining stores
Scroll through More stores and review the remaining destinations. Use the individual checkboxes deliberately and confirm the resulting selection before moving to dates and territories. The demo selection is an example, not a requirement for every release.

Part of More stores below the main services. Scroll to review the remaining destinations. Read the YouTube Content ID requirements
Open the information or warning icon beside a service when shown. YouTube Music and YouTube Content ID are separate entries. The Content ID note says additional requirements apply; read that guidance before enabling it for a recording.
A selected store is an intended destination. Its checkbox is not a delivery confirmation. After checking the destinations, continue down the same page to Release date and Territories.
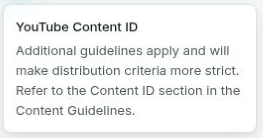
The YouTube Content ID information note. Set release and original release dates
Choose the timing for this release after checking the store selections. The form offers As soon as possible or On a date. Choose the option that reflects the release plan, then review any date constraints shown by the current workspace.
With On a date, enter the intended release date. Leave enough time for review and store processing under the applicable service requirements. Earliest is the date constraint shown by the form; it does not promise that a release submitted today will be available everywhere today.
Original release date is a separate optional field labelled If it came out somewhere before. Use the actual earlier publication date when applicable. For a first release, check the field instead of copying an unrelated historic date or accepting an unintended default.
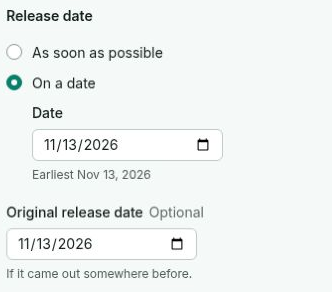
The date controls in a new draft. The displayed date is an example default, not a recommended schedule. Choose territories and save distribution settings
Choose Worldwide only when your rights and release plan cover that scope. Use Choose countries when distribution must be limited to selected markets, and review the resulting country selection before submitting. Confirm this alongside the permissions attached to the tracks.
Review the date and territory choices together with the store list. Save the draft and wait for All changes saved once the intended settings are in place.

Worldwide and Choose countries define the intended geographic scope. Review the full release and submit for review
Before submitting, return through the four stages and check the release as a listener and reviewer would see it. Compare the cover with the title and artists, then listen to the audio and verify the complete track order.
- Details: title and version, genre, languages, advisory, label, artists, contributor roles, owner names and years, and any existing UPC.
- Cover art: the correct square file, readable content, matching metadata and the necessary permission to use it.
- Tracks: the intended master for each recording, complete endings, correct durations, per-track information where needed, ISRC choices, and relevant supporting permissions.
- Distribution: the intended stores, release and original release dates, and territories consistent with the release plan.
Use the stage completion indicators to locate missing information, then confirm the actual field values. A completed stage or a saved file is not a human quality-control decision.
When all information and assets are ready, click Submit for review.
Read any validation message or confirmation presented by the service. Correct the indicated field or asset before trying again if submission is not completed.
Wait for the service to confirm the result, then check the release entry in the catalogue. Do not infer success just from clicking the button.

For a new draft, the final control is Submit for review. Check for edits that are not yet in review
An existing submission can show saved edits that are not yet in review. Read the warning above the editor and check the latest changes. Save draft preserves the edits; it does not make those changes part of the active submission.

An existing submission can have saved edits that are not yet in review. Resubmit updated information when needed
The warning states that resubmitting replaces the current submission and puts the release at the back of the review queue. Check the latest edits before taking that action. Save draft preserves edits; it does not make those edits part of the active submission.
No release was submitted or resubmitted for this guide. After review, follow the release status for delivery and store availability.

The existing example uses Resubmit for review for its later edits. Find and continue a saved draft
If you pause before submitting, return to Releases and open Draft. Search the title, artist or UPC when needed, then choose Continue draft for the intended entry. Confirm the title before entering more information so you do not create a second copy.
Continue draft edits opens saved changes attached to a release that already has a submission. The In review label can coexist with Unsubmitted edits. Read both labels: the submitted version and the latest saved draft can be at different stages.
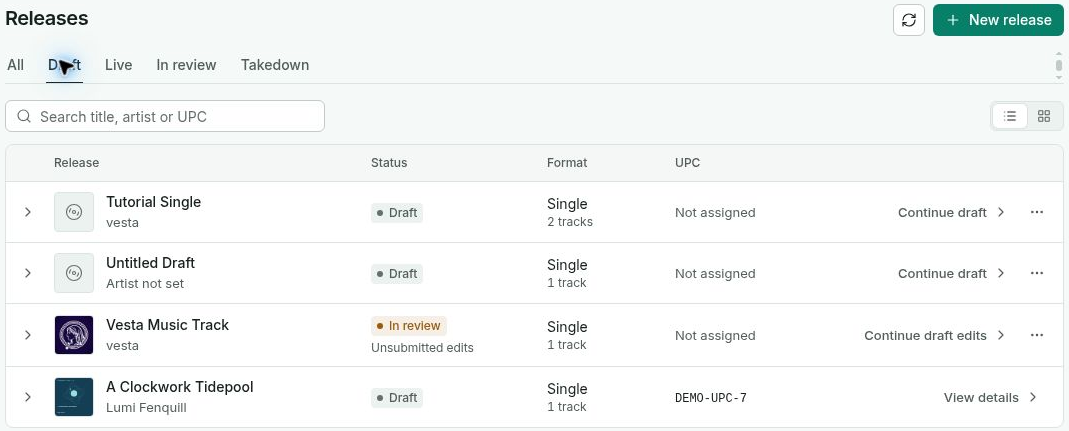
The Draft view includes saved drafts and an existing release with unsubmitted edits. Confirm review status and resolve missing results
After submitting your real release, check its recorded status in the catalogue. Refresh the list when necessary and allow it to load. If the expected submission is absent, reopen the correct draft and check for incomplete fields or messages before repeating the action.
Clear the search and check the selected catalogue tab and workspace. If you are in the editor, expand the relevant track row. If an upload or save is still in progress, let it finish before leaving or replacing the file. Use the Content guidelines link when a requirement needs clarification.
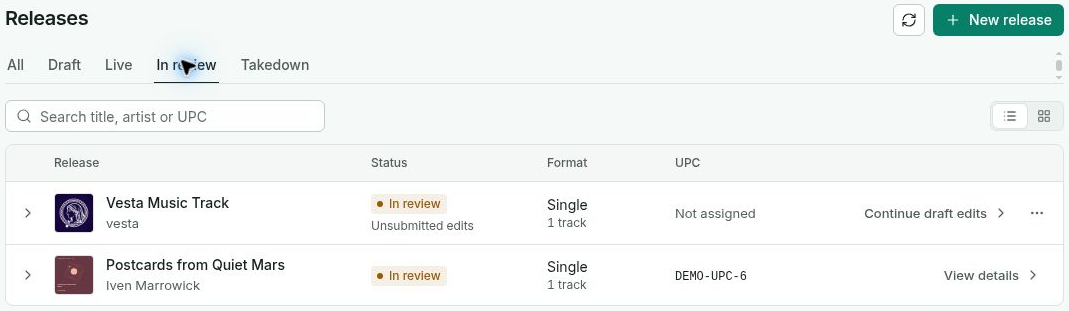
The In review view lists existing submissions. The first entry also has Unsubmitted edits.
You’re ready for the next step.
Need a hand with this guide? Talk to the Vesta team.